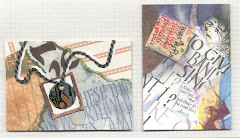
 I could spend a full day creating a card! Sometimes that's not the best use of my time, so instead I might throw a whack of stuff on a large sheet of card stock (which you can buy from your local friendly printer but not just any copy shop) then chop it up & glue the pieces on. I keep a stack of 8 1/2 x 11 card stock handy ready to cut in half for 2 cards; folded to 4 1/4" x 5 1/2".
This started as a 22"x35" blank sheet. I initialy worked on top of this paper while creating other cards. All the turquoise images are from the stamps I used on Sheri & Ian's card. (See previous posting below) Why waste all that nice ink? Here's the how-to:
- Stamp your stamps clean on large sheet of cover weight card stock.
- Scatter written words throughout; I used ruling pen & brown walnut ink for lettering large-they're pretty forgiving. Try sprinkling a metallic powder like Schminke over small areas of still-wet ink. A hint from Lisa Engelbrecht is to cover the jar opening with nylon pantyhose, wrap elastic band to hold in place. This ensures you'll get a sprinkle of powder, not a clump. You can still put the lid on when you're done if the elastic's far enough down.
- Overlap multiple stamps using various colors dye or pigment stamp ink. I just love Suzanne Cannon's new flourish stamps @ http://www.quietfiredesign.ca/. Tiny curlicues make great fillins.
 Now it's just a matter of cutting the sheet into smaller pieces & using them as the focal point on plain card stock. Double-sided adhesive tape works well.
Suzanne also has instructions to make the frame cards, which are really cool because you can see your message through the window, which takes care of "Now...what should I do on the inside". Here are the instruction for making window frame cards: http://www.quietfiredesign.com/Galleries/Projects/PinnedBackFlapsKristy.htm


No comments:
Post a Comment